Game Design Path
Say hello to your new best friend - meeting the map editor
All this time, we have been looking at a game that was pre-designed. But what good is a game that you cannot customise to make your own? Especially since the current implementation only has 2 very short levels..
When fetching the project from GitHub, you may have noticed, that there is a directory for the game itself - theBoyWithNoName directory. But there is also one called ‘MapEditor’.
As we delve into it, prepare your mind to be blown.

If you open this folder inside a file explorer, you will see that there are just two files inside: LICENSE.txt and MapEdit-1.0.1.jar.
The licenses are not going to be the focus of these guides, but do take a look at them if you plan on sharing your project with other people.
To open the map editor, fire up a new terminal window and navigate it to this folder.
Then, run java -jar MapEdit-1.0.1.jar &.
(Note: we use the symbol & at the end of the command so that the terminal window is usable while the map editor is running.)
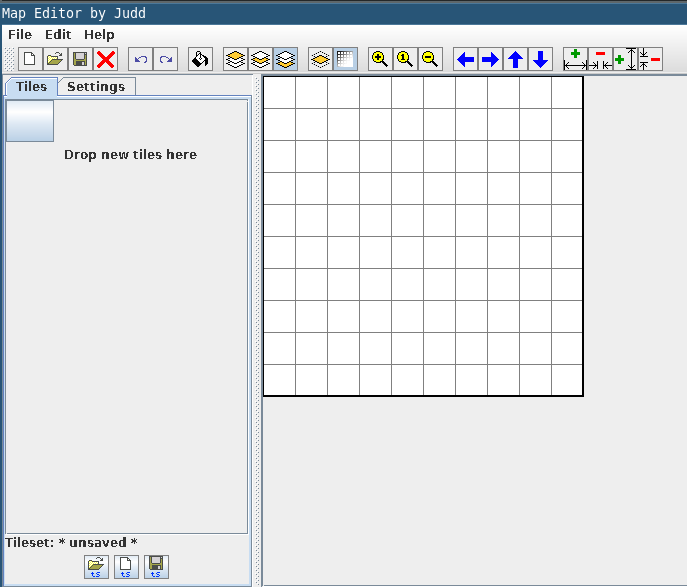
The map editor should open, hopefully looking at least a little like this:
Intermission - on tiles, tilesets and maps
The concept of a tile will be super useful to know before introducing more about how all this works.
The squares that make up the maps in this game are called blocks. You may have noticed while playing, that many blocks are identical - this is because they were placed using the same tiles. A tile is essentially a unique type of block - there can be many instances of a tile, but a tile is only one. You can think of them as reusable stamps, that make it much easier to create large maps.
To find the tile images for this game, look in the TheBoyWithNoName/assets/images/ directory in a file explorer.
A tileset is simply a collection of tiles.
Using our map editor, it is actually just a plain text file, stored in TheBoyWithNoName/assets/levels/tileset.txt.
Go ahead and open it up in a text editor, it should look like this:
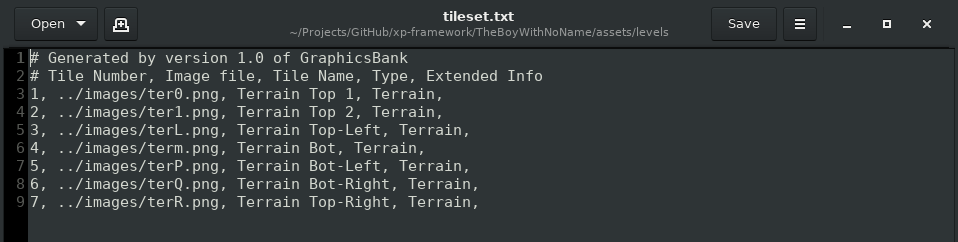
Every line here defines a new tile, by specifying its properties, separated by commas.
The comment at the top indicates what these properties are: # Tile Number, Image file, Tile Name, Type, Extended Info.
You can add your own tiles here manually, but if you stay patient just a little longer, we will see how the map editor can do this for us.
“Why does each tile need a number?” you may ask. This is a very valid question, that will get answered if you take a look at how a map file is made up.
The first level map can be found in TheBoyWithNoName/assets/levels/level1.txt
It is also a simple text file, that you can open with an editor. Its contents should look somewhat like this:
20 10 tileset.txt
colorization 1.0 1.0 1.0 0.0 1.0
.
0 0 0 0 0 0 0 0 0 0 0 0 0 0 0 0 0 0 0 0 0 0 0 0 0 0 0 0 0 0 0 0 0 0 0 0 0 0 0 0 0 0 0 0 0 0 0 0 0 0 0 0 0 0 0 0 0 0 0 0 0 0 0 0 0 0 0 0 0 0 0 0 0 0 0 0 0 0 0 0 0 0 0 0 0 0 0 0 0 0 0 0 0 0 0 0 0 0 0 0 0 0 0 0 0 0 0 0 0 0 0 0 0 0 0 0 0 0 0 0 0 0 0 1 0 0 0 0 0 0 0 0 0 0 0 0 0 0 0 0 1 1 1 2 2 1 7 0 0 3 1 1 2 1 1 1 2 2 1 2 4 4 4 4 4 4 6 0 0 0 5 4 4 4 4 4 4 4 4 4 4 4 4 4 4 4 6 0 0 0 5 4 4 4 4 4 4 4 4 4
0 0 0 0 0 0 0 0 0 0 0 0 0 0 0 0 0 0 0 0 0 0 0 0 0 0 0 0 0 0 0 0 0 0 0 0 0 0 0 0 0 0 0 0 0 0 0 0 0 0 0 0 0 0 0 0 0 0 0 0 0 0 0 0 0 0 0 0 0 0 0 0 0 0 0 0 0 0 0 0 0 0 0 0 0 0 0 0 0 0 0 0 0 0 0 0 0 0 0 0 0 0 0 0 0 0 0 0 0 0 0 0 0 0 0 0 0 0 0 0 0 0 0 0 0 0 0 0 0 0 0 0 0 0 0 0 0 0 0 0 0 0 0 0 0 0 0 0 0 0 0 0 0 0 0 0 0 0 0 0 0 0 0 0 0 0 0 0 0 0 0 0 0 0 0 0 0 0 0 0 0 0 0 0 0 0 0 0 0 0 0 0 0 0 0 0 0 0 0 0
0 0 0 0 0 0 0 0 0 0 0 0 0 0 0 0 0 0 0 0 0 0 0 0 0 0 0 0 0 0 0 0 0 0 0 0 0 0 0 0 0 0 0 0 0 0 0 0 0 0 0 0 0 0 0 0 0 0 0 0 0 0 0 0 0 0 0 0 0 0 0 0 0 0 0 0 0 0 0 0 0 0 0 0 0 0 0 0 0 0 0 0 0 0 0 0 0 0 0 0 0 0 0 0 0 0 0 0 0 0 0 0 0 0 0 0 0 0 0 0 0 0 0 0 0 0 0 0 0 0 0 0 0 0 0 0 0 0 0 0 0 0 0 0 0 0 0 0 0 0 0 0 0 0 0 0 0 0 0 0 0 0 0 0 0 0 0 0 0 0 0 0 0 0 0 0 0 0 0 0 0 0 0 0 0 0 0 0 0 0 0 0 0 0 0 0 0 0 0 0
The first line of this file has the dimensions of the map - the number of columns, then rows and then the name of the tileset file.
Afterward, there is a line about colourisation, that is a feature in the map editor, that we will not use. Unless you really want to ;) But we will not cover it in the guides.
Then there is a line with just a single “.”. This indicates that actual map data follows right after.
Then we have 3 very long lines of space separated digits. Each digit here corresponds to a tile number to be placed in a specific position in the map. The first digit is the tile in the position (0,0), the second is (0,1) and so on all the way until the last column is reached. At that point the next digit is the tile at (1,0) and like this, every column and row in the map is covered.
You will notice that only the first line actually has something other than 0s in it. This will be the topic of the next guide about world structure ✩°。⋆⸜(▀̿Ĺ̯▀̿ ̿)
A fun experiment to try here is to change some of these digits, save the file and see what happens in the game!
You can totally edit the maps with just a plain text editor. However, visualising what you’re doing is a little difficult for most humans. If you’re not human and are following these guides - do let us know what your experience is like, we’d love to hear!
Long time no see - let’s get back to the map editor
Alright, enough talking, let’s get to working. So, you have the map editor open, let’s channel the programmer way and get it to do the work for us!
The first thing to do in the map editor is to load the game’s tileset.
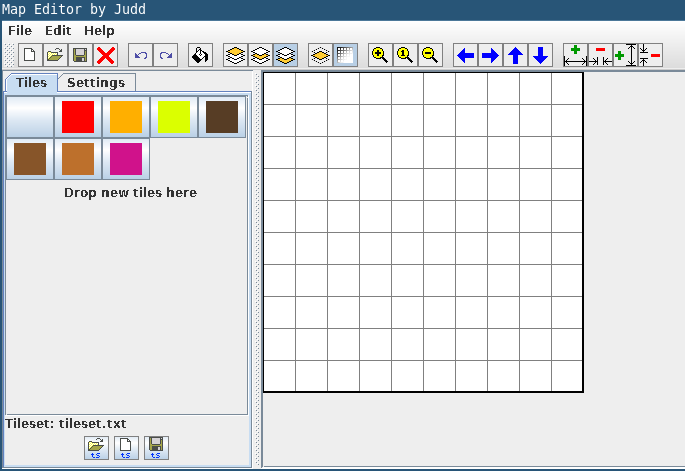
At the bottom of the editor’s window, under where it says Tileset: * unsaved *, click the open button.
A file open dialogue will appear. Navigate it to the tileset file. Once open, you should see some tiles in the editor, like this:
Now let’s open a map file. This time you want the open button on the top toolbar. Try opening “level1.txt” from the levels directory.
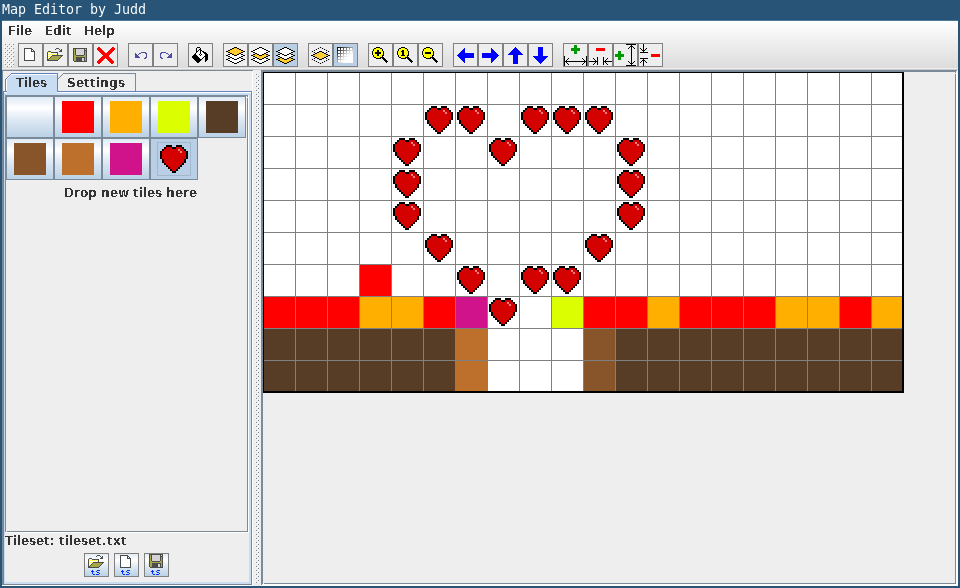
This is what the result will (hopefully) look like:
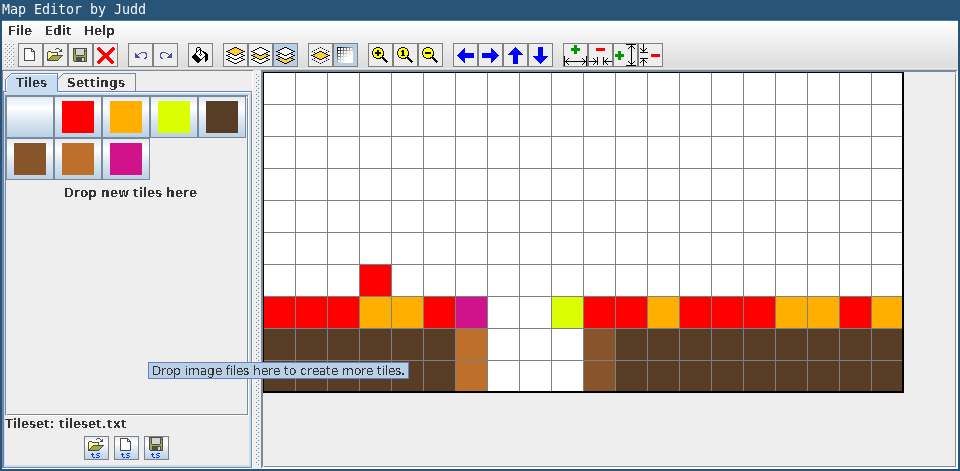
It’s the same map we have in the game! Yay!
A neat trick for the future is that you can just open a map directly, and the associated tileset will automatically be opened (it is specified in the map file after all).
To edit the map, select a tile from the panel on the left (the tileset) and click on a square in the map panel on the right to put it there. Perhaps you can see that it really is just like using a stamp.
To remove tiles, choose the blank tile in the tileset and place it like a normal tile.
When editing, don’t forget to save the map regularly, just in case.

After saving your changes, try running the game! The map in-game should reflect your edits.
This is your time to shine - adding your own tiles
The provided framework only has 7 different tiles. If you want to add some more, you will have to work together with the graphics designer.
Ask them to make a tile image for you and drag this into the tileset panel in the map editor. A dialogue like this will pop up:
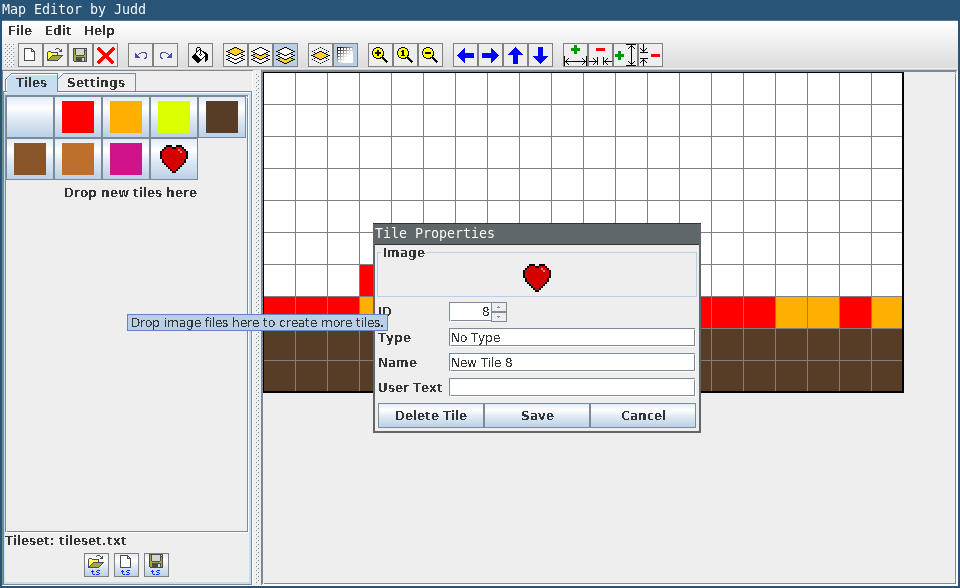
It will ask you for a tile ID. You can choose any number, just make sure that this number is not used by any other tile. Since it is just there for linking with the map file, you might as well leave it as the default.
Then it asks you for the tile type, where the default is “No Type”. The tile type is not actually used for anything, but you can change this! More discussion about it will follow in the next guide.
The name of the tile and the user text (description) are two more fields that are saved in the tileset, and loaded into the game but not really used for anything.
Make sure you save the tileset using the save button on the bottom of the tileset panel (not the top toolbar - that saves the map)!
One more guide - one more success
Now you have learned how to use the map editor. Play around for a bit and let your creative juices flow! ^_^
Here is your portal to the next dimension, where the technicalities behind map loading will be revealed:
